
Sold out!
Wait List Available.
Sandra Mollon
Fused Art Quilts From Photographs
5-Day Landscapes Workshop
Tuesday May 12 - Saturday May 16
Learn to adapt a photograph into a realistic art quilt.
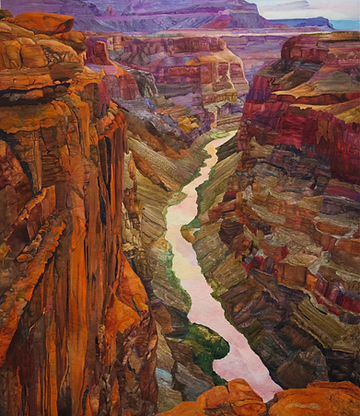
Landscapes are most popular. Workshop participants select an image to work from, get it enlarged, and trace a pattern from which to work. Another option is use any pattern by Sandra, which may be appropriate for beginning students who do not have an image they want to use. Fusing into place, the use of media, and quilting techniques are covered in class.
Getting Started:
If you are working from your own photograph, be sure you have selected one to use that you would enjoy making, with clear details (good resolution), and a subject that would be interesting. Unless you have taken a class with me before, and have become very comfortable with the process, I recommend a simple subject.
What is a simple subject? One with significantly less details. I highly recommend that you email me your images if you have never done this process. If you are unsure about your image and want advice please email the photo (at least 3 weeks in advance if possible) to me. sandra@sandramollonquilts.com
Please limit the number of images you send to your 2 favorites.
If you are using someone else’s photo, you should get permission from them before you start. I often will get that in writing before I begin, as I usually enter my quilts in large shows, which may require a written permission.


Supplies needed:
-
Misty Fuse fusible web. I prefer this type because it doesn’t seem to build up in your machine, or make your needle gummy, or make the finished quilt rock hard like a piece of cardboard. You will want at least 4-5 yards.
-
Freezer Paper: You will need enough freezer paper to trace your entire image on. If your enlargement is bigger than the 18” wide freezer paper, you will need to tape pieces together—butt up—don’t overlap (use beige masking tape) to make a big enough piece.
-
A travel size iron and ironing mat
-
Light box (Unless you complete the tracing in advance)
-
Pencil with an eraser
-
Scissors for cutting paper and fabric
-
A Slice ceramic craft knife (highly recommended). Do not use an Exacto knife with a metal blade—it can cut your fabric. I usually have some with me to sell, contact me to hold one for you.
-
Silicon Goddess Sheets or 1 yard Parchment paper (Reynolds brand or Costco brand parchment paper work well).
Fabric:
You will need a piece of background fabric or a cotton solid or batik (choose a color for this that is often seen in the photo) the size of your enlargement (or pattern) with a bit left around the work to be trimmed off later.
Be sure to really look at your image, and spend some time finding fabrics which are close in both the color and values you see—batik fabrics are preferred for this process. Avoid solids, prints of all types, and fabrics that fray easily. Good quality hand dyed cottons are great. This requires you to look at your image very carefully. The amounts of each have more to do with your picture, so I cannot give you an exact amount. Have a large variety (something like 30-40 different fabrics, in 1/8 yard to 1/4 yard amounts, which is most likely enough. Make sure your fabric selection is varied in the types of batiks as well as color and value. Sandra will offer her hand-dyed sky fabrics and other hand-dyed fabric for sale in the classroom.
Once you have selected your photo, you will need to print out the photo in color in whatever size you want the finished quilt to be. For this workshop I recommend that it be no larger than 36” on a side. I am doing most of my large printing at VistaPrint.com.
To use your time wisely in class, I recommend doing the tracing in advance of the workshop. I have a video link ready to email to all participants at least one month prior to the workshop. This video covers selecting an image, choosing fabrics, and tracing. Tracing what lines and shapes of the image that you can see is an important step in the process.
If your image is wider than 18” in any direction, you may need to use masking tape to tape a second sheet of freezer paper butted up next to the first. Place your photo on a light box or taped to the window. Carefully trace every shape and value change using a pencil. Bring the enlargement to the workshop along with the traced drawing on freezer paper. If you do not get your tracing completed in advance you may want to bring a light box to use at the workshop.


Quilting:
Generally speaking, the vast majority of students do not complete their quilt top in a workshop. Unless you have a very simple image, all quilting is completed later. If you do think you will get to that step, you can bring a sewing machine, thread, batting and backing. Please email me for further information regarding this step if you plan to bring a machine.
I will bring the following media to the workshop for classroom use, but if you want your own set read this information below:
Color Pencils, Ink, Fabrico Markers, and Oil Pastels are all media I regularly use, and recommend good quality color pencils like Prismacolor. I also used Cray Pas oil pastels. Colors in the Fabrico markers will vary according to the image. Colors I use most often are: #152 Sand, #181 Cool Grey, #155 Truffle Brown, and #182 Real Black.

Sandra Mollon—Textile Artist, Instructor,
Author, Designer
Sandra is an award winning quilter living in Northern California. She has been quilting for over 30 years, and teaching for 18 years.
Sandra began as a traditional quilter, specializing in hand appliqué for a couple of decades. You can see a few of my quilts in the book, “500 Traditional Quilts” by Lark Publications. She is currently working on a book to be released in 2021 with C & T Publication for her original designed quilt, “Seasons of Life.
She has had many quilts juried into large international and regional juried shows. Her traditional quilt, “Season’s of Life” won a major award in 2019 both at Road to California (Outstanding Large Quilt), and at the 2019 AQS Paducah show it won a purchase award and is in the National Quilt Museum in Paducah, KY.
Additionally her work in art quilting has wonderful many place awards, a “Best Pictorial” award and a 3rd place award in 2019 at PIQF, a 1st Place in Wall at MQX 2019, Best of Show Award and 1st place at the RCQG show in Sacramento Ca, 2018, and a 3rd place at Road to California in 2020.
She enjoys teaching as well as working on her art, and loves to travel and meet new people.